Some history about the 2008 F-150 engine...
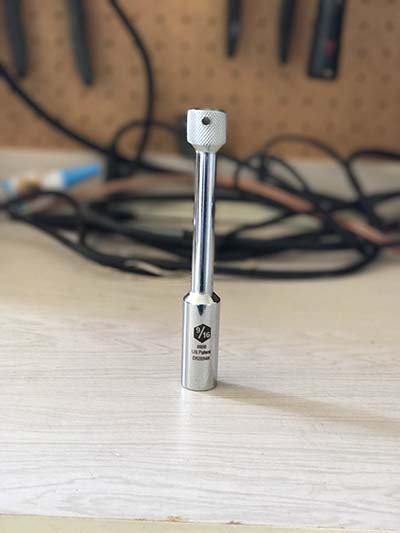
Special Socket OTC Spark Plug Socket 9/16
has the soft rubber insert. Drive size is a 3/8 inch. Socket size is the 9/16 inch. Length is 5-7/8 inch. Ratchet here is a click torque set to Ford spec to 34 N•m (25 lb-ft) BTW the
expected removal torque is about 33 lb-ft (45
N•m).
Note: DO NOT USE AIR OR POWER TOOLS FOR
SPARK PLUG REMOVAL. SPARK PLUGS MUST
ONLY BE REMOVED WITH HAND TOOLS.
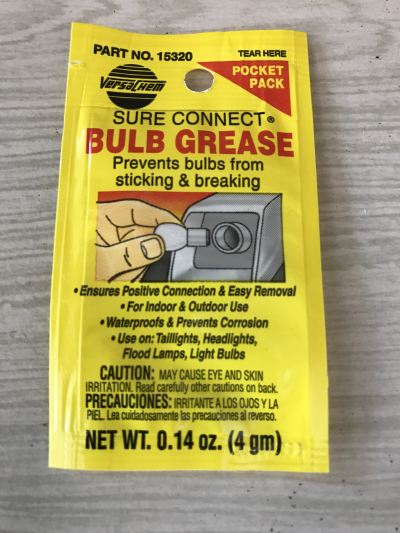
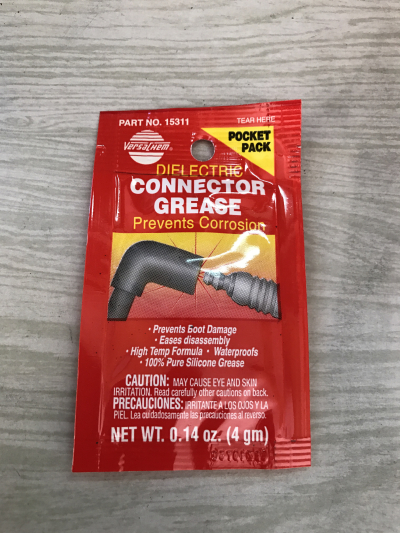
Note: Ford recommends Motorcraft Silicone Brake Caliper Grease and Dielectric Compound ESE-M1C171-A
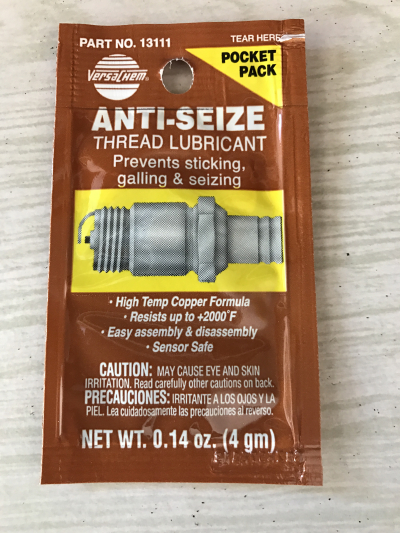
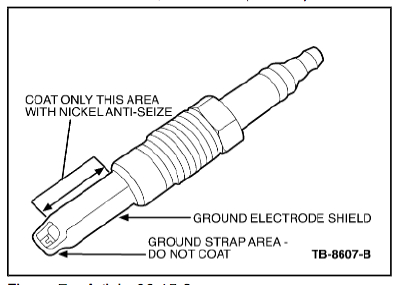
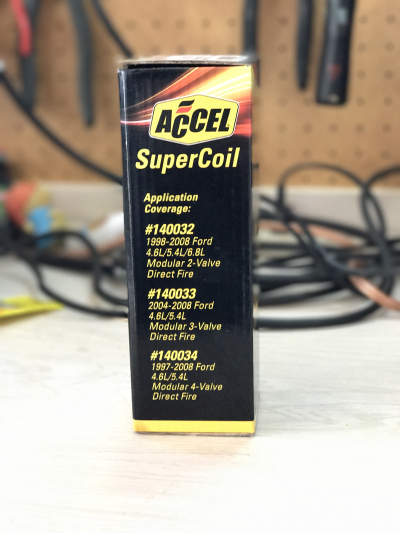
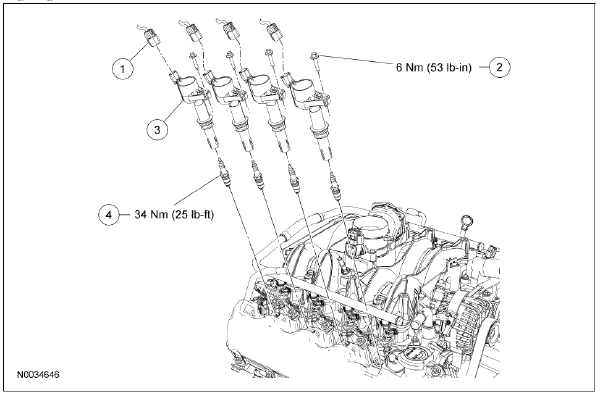
Note: Ford recommends Motorcraft High Temperature Nickel Anti-Seize Lubricant XL-2. It is rated up to 2552°F (1400°C) whereas competitors seem to be rated in the 1600°F (871°C) Accel SuperCoil #140033 quantity of 8, I am experimenting not using the Motorcraft recommended coils. These are same values as Motorcraft OEM 0.5 ohms on primary and 5.43 K Ohms on the secondary but the turn ratio is 68:1, delivering 10-15% more energy than OEM's. Peak current is guessed at 8.5 A at 35,000 volts. Check out my link at the bottom of the page about using Granatelli coils. Ford says to tighten these down to 6 Nm (53 lb-in). Ford also says you should disconnect the battery ground cable prior to disconnecting the ignition coil electrical connector.
Ford note: The current flow, or dwell, through the primary ignition coil is controlled by the PCM by providing a switched ground path through the ignition coil driver to ground. When the ignition coil driver is switched on, current rapidly builds up to a maximum value, determined by the coil inductance and resistance. When the current is switched off, the magnetic field collapses which induces a secondary high voltage surge and the spark plug is fired. This high voltage surge creates a flyback voltage which the PCM uses as a feedback during the ignition diagnostics. The PCM uses the charge current dwell time characteristics to carry out the ignition diagnostics.
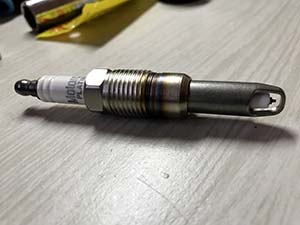
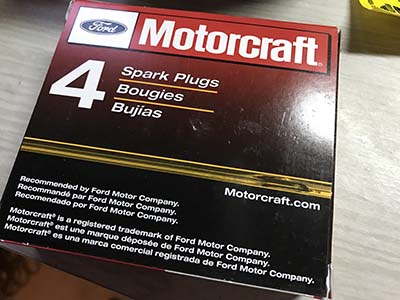
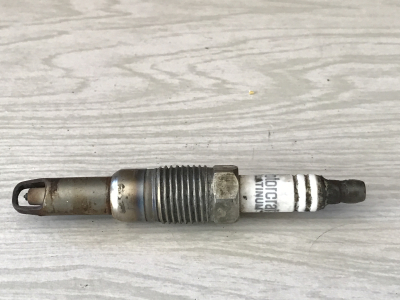
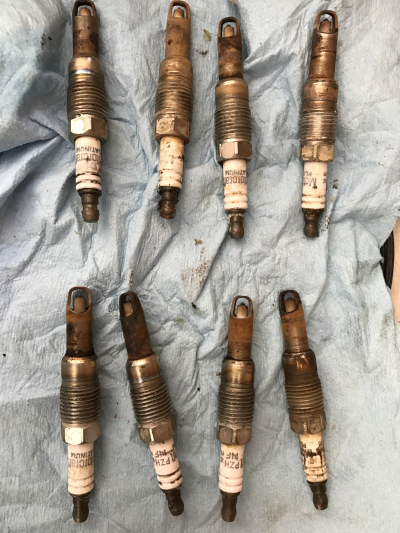
Note: Ford recommends Motorcraft Coil on Plugs DG-508 with black boots for this specific model with the 5.4L 3V . Note: These plugs are the Ford recommendation! Motorcraft Quantity of 8 Spark Plugs SP-515 PZH14F Finewire Platinum. I haven't had these break off myself but I heard with champion spark plugs the nut and electrode shell are machined as one solid piece too. It is also known that the stock plugs were the PZT14F's and those were bad to remove as they were designed in two pieces. Anything sold these days by Motorcraft are the new redesigned ones. Ford says to tighten to 34 Nm (25 lb-ft). Note that the spark plug gap is NOT adjustable which saves us time and probably could deserve its own page to explain why this is. Spec is at 1.15± 0.13 mm (0.040 to 0.050 in) The gap refers to the electrode gap, the area where the spark occurs between the center electrode and the ground electrode that ignites the air fuel mixture in the engine's cylinder reaching 10's of thousands of degrees Fahrenheit. Georgia State University has a great short document on this.
Check it out over at their
Dept of Physics and Astronomy page. Another fun page is to learn about the Firestorm plug by Robert Krupa with an air fuel ratio of 40:1 over on HHO4Free's site
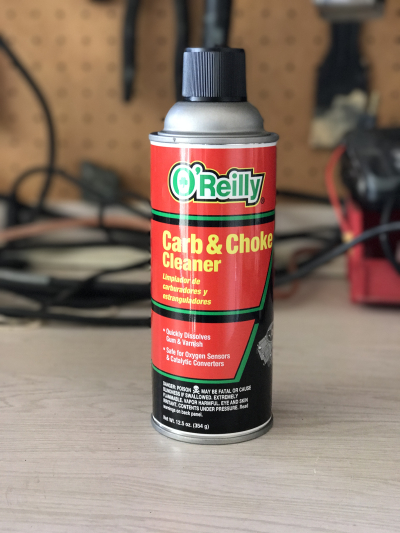
Carb cleaner applied using a flex/bend spout funnel to reach the spark plug well to loosen up the plug - blow it out with a air compressor after extraction. Note: Ford recommends Motorcraft, PM-3 & Motorcraft Metal Brake Parts PM-4-A Carburetor Tune-Up
Cleaner OBDII plug-in (On Board Diagnostic) OBDII plug-in to read codes - "Xseries Auto Wi-Fi ELM 327" and an iOS or Android device to interpret the readings.
OBDFusion iOS app is what I use from the app store and the Ford 2008 Enhanced Diagnostic add on ($9.99) will give you slightly over 300 additional PIDs (parameter identification) to scan on.
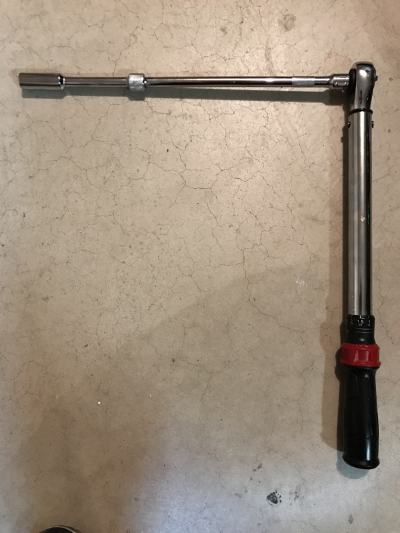
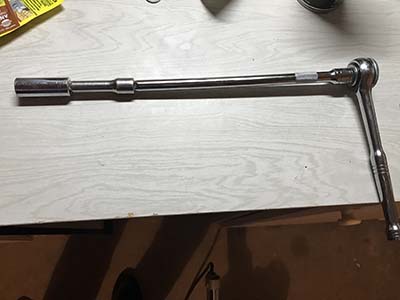
Ratchet 3/4” ratchet with a 10” extension plus a 3” extension with a 9/16 socket
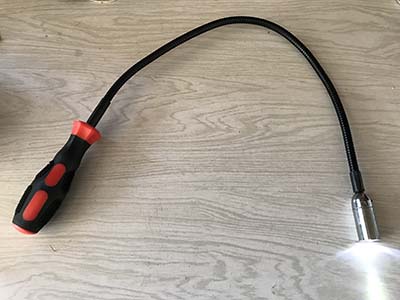
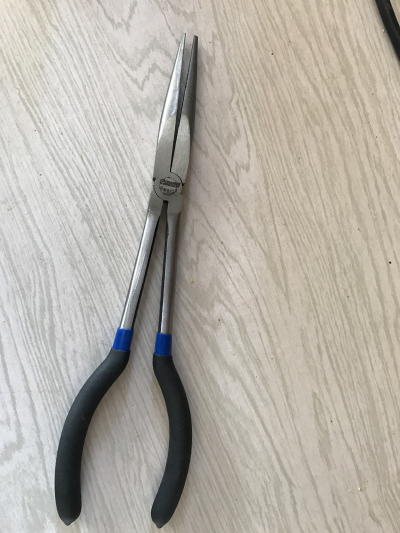
Magnetic Pickup Tool flexible magnetic tool (23-1/2" overall length) with led light to pull out plug once unthreaded or a long needle-nose pliars
With iOS device on and selected WiFi of the OBDII unit, launch the app and click on connect, make sure you have the OBDII configured for your make/model vehicle
Turn key to the 2nd position for the electrical to work - ACC/ACCESSORY. Ensure the unit is connecting to vehicle and getting the codes. If and when you decide to drive it with the OBD connected, the fuel tank level should be between 1/2 and 3/4 full with 3/4 full being the most desirable.
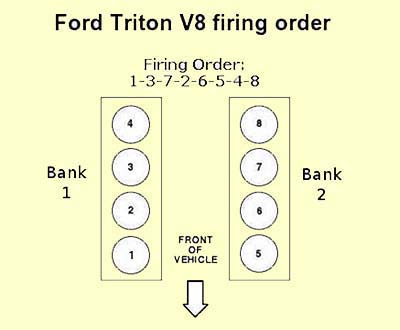
Cylinder firing order: Here is the layout of the cylinders. Base timing is 10° BTDC (before top dead center)
Exploded view
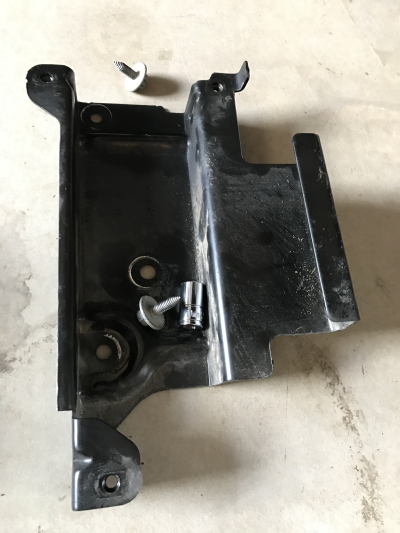
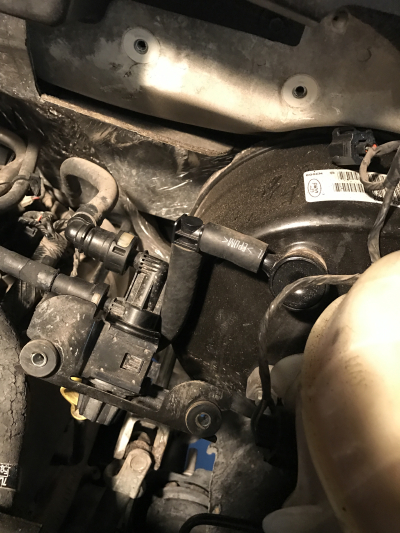
Remove to get access: Removing the PCB and the bracket makes replacing coil/spark plug #4 a lot easier! The PCM 190 PIN harness connectors are from left to right: Transmission, Body/Cowl, Engine
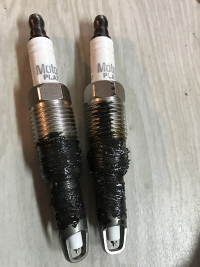
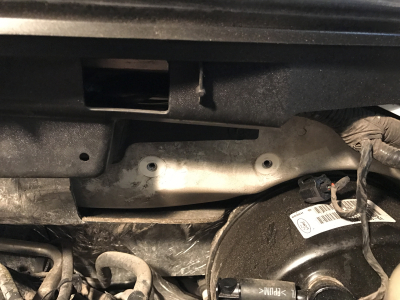
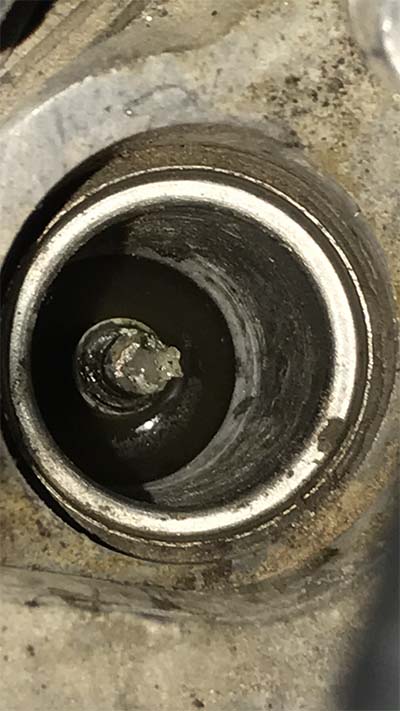
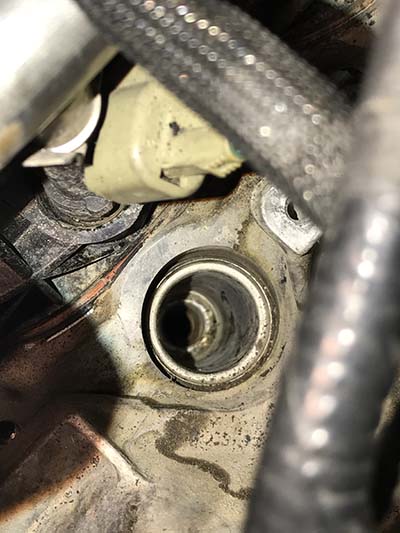
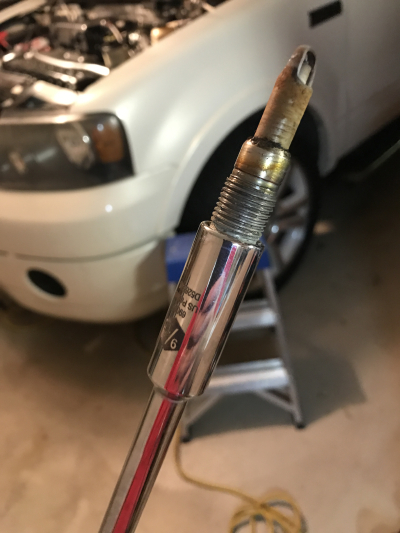
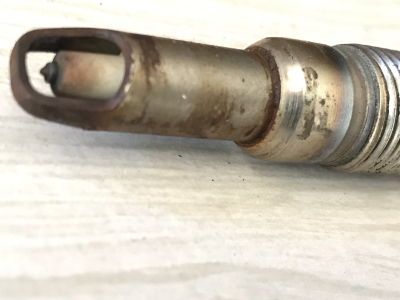
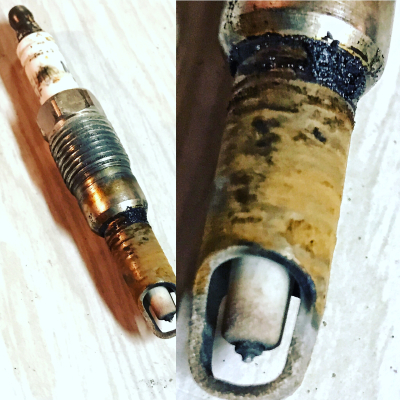
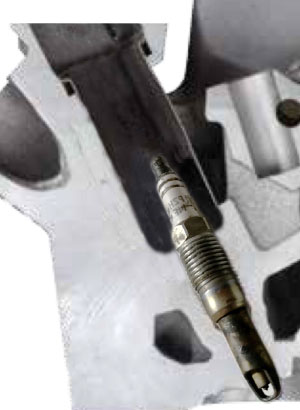
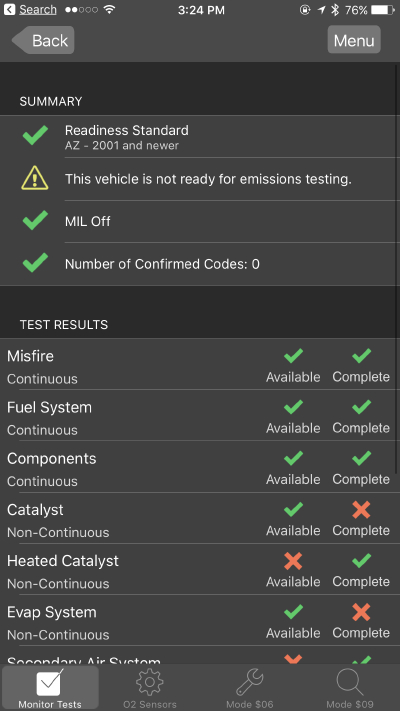
Remove to get access: Remove the two bolts and folding down the vapor canister purge valve makes it a lot easier to install/remove coil/spark plug #8! Plug well: This is what a bad spark plug looks like looking down into the plug well. There is some carb cleaner sitting on it. If the coil boot seals aren't that great then you can get all kinds of stuff in there between the spark and the coil boot Plug well: This an empty plug well for coil #6 OTC works well extracted plug using the OTC socket Spark plug gone bad: pulled bad spark plug. You want to check for oil and carbon fouling. Check for wet, black deposits on the insulator shell bore electrodes, caused by excessive oil entering the combustion chamber through worn rings and pistons, excessive valve-to-guide clearance or worn or loose bearings. Look for black, dry, fluffy carbon deposits on the insulator tips, exposed shell surfaces and electrodes, caused by a spark plug with an incorrect heat range, dirty air cleaner, too rich a fuel mixture or excessive idling. Inspect for overheating, identified by white or light gray spots and with bluish-burnt appearance of electrodes. This is caused by engine overheating, wrong type of fuel, loose spark plugs, spark plugs with an incorrect heat range, low fuel pump pressure or incorrect ignition timing. Plug well: This is graphic depiction of the cylinder with a spark plug but w/o the coil See the OBD app: not ready for emissions testing after disconnecting the wiring harness. On the summary page, once it says ready for emissions, the catalyst test will be complete. The test will be complete when you drive in stop and go traffic conditions. Include 5 different constant cruise speeds, ranging from 20-55 mph and over a 10 minute period.
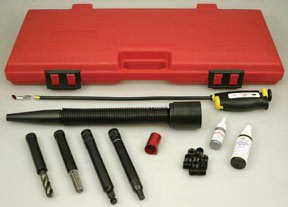
This document covers the easiest process to the nightmare process. The nightmare process is when the spark plug won’t come out and the Lisle extraction kit attempt fails and it itself breaks and you have to use the rest of the Lisle extractor kit parts to use as a guide to drill and bore out the tip of the broken off plug by using a ball burr bit through the guide. Using a drill adapter will drill out the broken off tool. The extractor itself threads into the tip of the broken off plug. Make sure you are using the latest revision of the Lisle tool, you can identify it with the rings around the extraction tool, 1 line, 2 line, and 3 line. Don’t buy the 1 or 2 line kit used. Buy the 3 line tool or else you will probably break the tool that is used to fix a broken plug.
Broken Plug removal and rethread: the very $$$ Lisle kit; there is a lower cost reduced number of items set that you can get on Amazon for under $100 Coil On Plug (COP) The COP ignition operates similar to a standard coil pack ignition except each plug has one coil per plug. The COP has 3 different modes of operation: engine crank, engine running, and CMP failure mode effects management (FMEM). Crankshaft Position (CKP) Sensor The CKP sensor is a magnetic transducer mounted on the engine block adjacent to a pulse wheel located on the crankshaft. By monitoring the crankshaft mounted pulse wheel, the CKP is the primary sensor for ignition information to the PCM. The pulse wheel has a total of 35 teeth spaced 10 degrees apart with one empty space for a missing tooth. The 6.8L 10-cylinder pulse wheel has 39 teeth spaced 9 degrees apart and one 9 degree empty space for a missing tooth. By monitoring the pulse wheel, the CKP sensor signal indicates crankshaft position and speed information to the PCM. By monitoring the missing tooth, the CKP sensor is also able to identify piston travel in order to synchronize the ignition system and provide a way of tracking the angular position of the crankshaft relative to a fixed reference for the CKP sensor configuration. The PCM also uses the CKP signal to determine if a misfire has occurred by measuring rapid decelerations between teeth. Camshaft Position (CMP) Sensor The CMP sensor detects the position of the camshaft. The CMP sensor identifies when piston number 1 is on its compression stroke. A signal is then sent to the PCM and used for synchronizing the sequential firing of the fuel injectors. Coil-on-plug (COP) ignition applications use the CMP signal to select the correct ignition coil to fire.
Cylinder Head Temperature (CHT) Sensor The CHT sensor is a thermistor device in which resistance changes with the temperature. The electrical resistance of a thermistor decreases as temperature increases, and the resistance increases as the temperature decreases. The varying resistance affects the voltage drop across the sensor terminals and provides electrical signals to the PCM corresponding to temperature.
The CHT sensor is installed in the cylinder head and measures the metal temperature. The CHT sensor can provide complete engine temperature information and can be used to infer coolant temperature. If the CHT sensor conveys an overheating condition to the PCM, the PCM initiates a fail-safe cooling strategy based on information from the CHT sensor. A cooling system concern such as low coolant or coolant loss could cause an overheating condition. As a result, damage to major engine components could occur. Using both the CHT sensor and fail-safe cooling strategy, the PCM prevents damage by allowing air cooling of the engine and limp home capability
Some of the Physics behind all this:
All the Tools I Used:

CAUTION
EXCESSIVE MOTORCRAFT
‚
CARBURETOR
TUNE-UP CLEANER, OR REPEATING THE
PROCESS SEVERAL TIMES WITH TOO MUCH
CLEANER FLUID, COULD INTRODUCE ENOUGH
LIQUID VOLUME TO HYDRO-LOCK THE ENGINE. I used no more than 1 teaspoon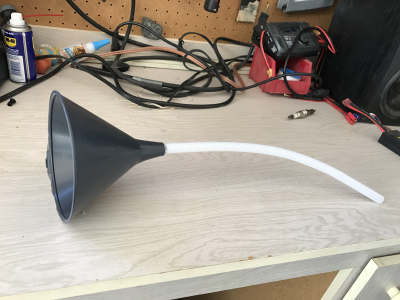


Tools w/o the OTC Ford spark plug socket:
PROCESS:
A side note: during engine crank the PCM fires 2 spark plugs simultaneously. Of the 2 plugs simultaneously fired one will be under compression the other will be on the exhaust stroke. Both plugs fire until camshaft position is identified by a successful camshaft position (CMP) sensor signal. Once camshaft position is identified only the cylinder under compression is fired. During CMP FMEM the COP ignition works the same as during engine crank. This allows the engine to operate without the PCM knowing if cylinder one is under compression or exhaust.

Lisle tool:
Definitions
Vehicles with 2 CMP sensors are equipped with variable camshaft timing (VCT). They use the second sensor to identify the position of the camshaft on bank 2 as an input to the PCM.
There are 2 types of CMP sensors: the 3-pin connector Hall-effect type sensor and the 2-pin connector variable reluctance type sensor.